

From Concept to Production: A Developer’s Roadmap for Mechanical Prototyping
Mechanical prototyping is a critical phase in product development—bridging the gap between an idea and a manufacturable, reliable physical product. For developers (especially those with a software or systems background), understanding the mechanical prototyping lifecycle can be transformative. This roadmap outlines a structured, practical path from initial concept to production-ready design.
Phase 1: Ideation & Conceptualization
Goal: Define what you’re building and why.
Key Activities:
- Identify User Needs & Problem Statement:
Ask: What problem does this solve? Who is the user? Use empathy mapping and user interviews. - Sketch Initial Concepts:
Use pen-and-paper or digital tools (e.g., Miro, Figma) to explore form, function, and interaction. - Define Functional Requirements:
List must-have features (e.g., “must withstand 50 lbs of force,” “must fit in a 3-inch diameter space”). - Set Constraints Early:
Consider budget, materials, manufacturing method, size, weight, and timeline.
💡 Pro Tip: Create a “concept matrix” comparing multiple ideas based on feasibility, cost, performance, and user value.
Phase 2: Design & Digital Modeling
Goal: Turn sketches into detailed, testable digital models.
Tools:
- CAD Software: SolidWorks, Fusion 360, Onshape, AutoCAD
- Simulation Tools: ANSYS, SimScale, Autodesk Inventor (for stress/thermal/fatigue analysis)
Key Steps:
- Create 3D Models:
Build accurate parametric models with dimensions, tolerances, and material properties. - Design for Manufacturability (DFM):
Avoid sharp corners, undercuts, complex internal geometries unless necessary. - Integrate Electronics & Mechanics:
If your device includes sensors, motors, PCBs, or batteries, model their placement and interfaces. - Conduct Virtual Testing:
Run simulations for structural integrity, thermal behavior, motion paths, and interference checks.
⚠️ Watch Out: Don’t skip tolerance stack-up analysis—small gaps can cause assembly failure.
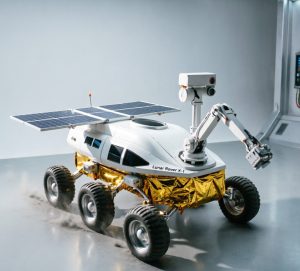
Phase 3: Rapid Prototyping & Iteration
Goal: Validate functionality and ergonomics quickly and affordably.
Prototyping Methods:
| Method | Best For | Speed | Cost |
|---|---|---|---|
| 3D Printing (FDM, SLA) | Functional parts, form studies, quick iterations | Fast | Low–Medium |
| CNC Machining | High-strength metal/plastic parts, precision components | Medium | Medium–High |
| Laser Cutting | Flat parts (metal, acrylic, wood), enclosures | Fast | Low |
| Injection Molding (low-volume) | Near-production parts, plastic housings | Slower | Higher |
Workflow:
- Print/produce a prototype.
- Test it physically: Does it fit? Does it move as expected? Is it strong enough?
- Document issues: misalignments, weak joints, usability problems.
- Iterate: Update CAD model → re-print → re-test.
🔄 Iterate until you have a “working” prototype—not perfect, but functional.
Phase 4: Functional Validation & Testing
Goal: Ensure the prototype performs reliably under real-world conditions.
Types of Tests:
- Durability Testing: Drop tests, vibration, cycling (e.g., 10,000 cycles).
- Environmental Testing: Temperature extremes, humidity, dust exposure.
- User Testing: Observe real users interacting with the prototype.
- Compliance Checks: Safety standards (UL, CE, RoHS), IP ratings, regulatory requirements.
Documentation:
- Keep a testing log: date, condition, result, issue, fix.
- Use photos/videos to document failures.
✅ Success Signal: All core functions work consistently across 3+ test cycles.
Phase 5: Transition to Production
Goal: Prepare the design for scalable, cost-effective manufacturing.
Key Actions:
- Finalize Design for Manufacturing (DFM/DFA):
Simplify part count, standardize fasteners, optimize for automation. - Select Final Materials & Finishes:
Balance performance, cost, availability, and sustainability (e.g., recycled plastics). - Choose Manufacturing Process:
- Injection molding (high volume, low per-unit cost)
- Sheet metal fabrication (durable enclosures)
- Die casting (metal parts with high precision)
- Additive manufacturing (customized or low-volume)
- Develop Tooling & Jigs:
Work with suppliers early to design molds, fixtures, and assembly jigs. - Prototype Production Runs:
Order small batches (e.g., 50–100 units) for final validation. - Quality Assurance Plan:
Define inspection checklists, acceptance criteria, and defect tracking.
🔗 Collaborate Early: Involve your manufacturer during DFM reviews—they’ll spot issues you might miss.
Phase 6: Scaling & Continuous Improvement
Goal: Maintain quality while increasing production volume.
Post-Launch Focus:
- Monitor field feedback and failure reports.
- Implement design improvements (e.g., replace a brittle plastic part with a more durable one).
- Optimize supply chain and reduce costs without sacrificing quality.
- Prepare for next-gen versions (modular design helps).
Developer’s Toolkit: Must-Have Skills & Resources
- CAD Proficiency: Learn at least one robust CAD tool.
- Basic Engineering Knowledge: Understand stress, torque, friction, and kinematics.
- Manufacturing Awareness: Know common processes and their trade-offs.
- Agile Prototyping Mindset: Fail fast, learn faster.
- Open-Source Libraries: Grab pre-designed parts (e.g., Thingiverse, GrabCAD) to accelerate development.
Final Thoughts
Mechanical prototyping isn’t just about making something that looks good—it’s about making something that works, lasts, and scales. As a developer, your strength lies in systems thinking, iteration, and integration. By embracing the full prototyping lifecycle, you transform abstract ideas into tangible, market-ready products.
🛠️ “The best prototypes aren’t perfect—they’re honest.”
Bonus: Checklist Summary
✅ Defined problem & user needs
✅ Created 3D CAD model with DFM in mind
✅ Built and tested at least 3 physical prototypes
✅ Validated under real-world conditions
✅ Finalized for production (materials, process, tooling)
✅ Produced pilot batch and verified quality
With this roadmap, you’re not just coding—you’re crafting the future, one prototype at a time. 🚀